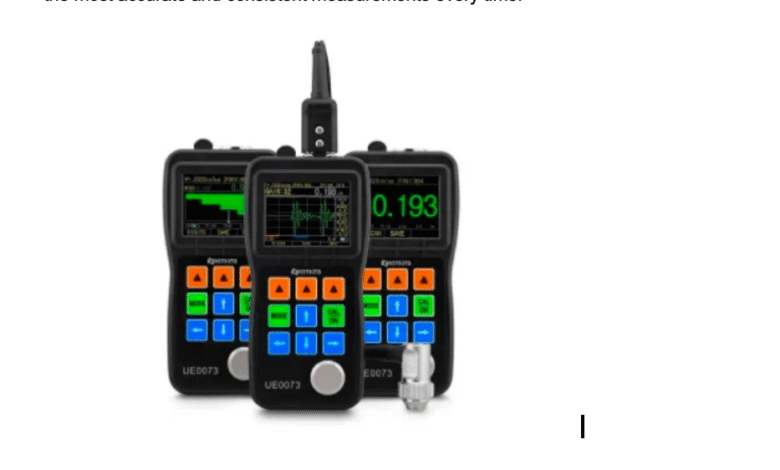
Common Mistakes When Using Ultrasonic Metal Thickness Gauges

If youŌĆÖre using an ultrasonic metal thickness gauge, youŌĆÖre likely working in an environment where accuracy, efficiency, and safety matter. Whether youŌĆÖre monitoring corrosion in pipelines or checking wear on industrial equipment, precise readings are essential. But even with a reliable device, mistakes in how you use it can lead to false data, safety risks, or unnecessary maintenance work.
In this article, youŌĆÖll discover the most common user errorsŌĆöand how to avoid themŌĆöso you can get the most accurate and consistent measurements every time.
Neglecting Calibration Can Skew Your Results
One of the most frequent mistakes is skipping the calibration process. If you assume your gauge is accurate out of the box or from the last job, youŌĆÖre putting your measurements at risk.
Each metal type transmits sound at a different speed. Steel, aluminum, copperŌĆöall require their own settings. If you donŌĆÖt calibrate your gauge to match the specific material youŌĆÖre testing, your readings can be off by millimeters.
Tip:┬ĀUse a certified reference block of the same material type. Most modern devices allow single-point or two-point calibration. Make this step part of your standard prep routine.
Poor Couplant Application Weakens Signal Quality
Ultrasonic waves canŌĆÖt travel through air, which is why a couplant is necessary between the probe and the metal surface. But using the wrong substanceŌĆöor applying it unevenlyŌĆöcan lead to poor signal transmission.
Some users use water or oil as a substitute, which may work temporarily but doesnŌĆÖt provide consistent contact. Others use too little couplant or allow it to dry mid-measurement.
Tip:┬ĀAlways use a recommended gel-type couplant and apply it evenly. Reapply as needed, especially for long inspection sessions or rough surfaces.
Measuring Over Paint Without Compensation? Expect Inflated Numbers
If youŌĆÖre measuring painted or coated metal surfaces with a standard ultrasonic gauge, your results will likely include the coating thicknessŌĆöleading to overestimated readings.
Many gauges canŌĆÖt distinguish between the paint layer and the actual metal. If you skip surface preparation or use the wrong device, your inspection loses credibility.
Tip:┬ĀIf surface stripping isnŌĆÖt feasible, use a coating-through ultrasonic thickness gauge┬Āwith echo-to-echo functionality. These devices ignore the coating layer and measure the true metal thickness underneath.
Skipping Surface Cleaning? Say Goodbye to Accuracy
Another common oversight is testing dirty, rusted, or uneven metal surfaces. Corrosion, paint flakes, scale, or grease can scatter sound waves and interfere with reliable readings.
If your probe isnŌĆÖt sitting flat and cleanly on the surface, the gauge may give unstable or fluctuating valuesŌĆöor no reading at all.
Tip:┬ĀUse a wire brush or sandpaper to prep the area. Remove loose debris and smooth the surface as much as possible. The better the contact, the better the result.
Temperature Can Distort Thickness Values
Ultrasonic velocity changes with temperature. If youŌĆÖre measuring a hot metal pipe or tank wall, and the device isnŌĆÖt temperature-compensated, expect deviations in your data.
Some users assume ambient settings are sufficient for all jobs, but high or low temperatures can skew results significantly.
Tip:┬ĀIf you must measure hot materials, use a gauge that allows temperature input or has auto compensation. Otherwise, let the part cool before testing for best accuracy.
Incorrect Probe Handling Leads to Unstable Readings
Even with good calibration and surface prep, your measurements can still be inconsistent if youŌĆÖre not holding the probe correctly. Tilting the probe, applying uneven pressure, or moving during measurement all affect data quality.
Tip:┬ĀKeep the probe perpendicular to the surface and hold it steady. Apply firm, even pressure and avoid rocking or dragging. If your model has a measurement stability indicator, use it to confirm solid contact.
Overlooking Device Settings Can Cause Confusion
Using a nearly depleted battery or forgetting to check unit settings (like mm vs. inches) might seem minor, but they can cause big errors in recorded data or even interrupt inspections.
In some cases, users accidentally leave the wrong material velocity setting from a previous job, leading to every reading being invalid.
Tip:┬ĀBefore starting, check battery levels, display settings, and velocity configuration. Build this into your pre-inspection checklist.
Taking Only One Reading? ThatŌĆÖs Not Enough
Relying on a single measurement point is risky. Corrosion and erosion often appear unevenly. A localized thin spot could be missed entirely if youŌĆÖre not thorough.
Tip:┬ĀAlways take multiple readings across the area being inspected. If your device has an averaging mode, use it. For critical applications, scan methodically and record minimum, maximum, and average values.
Using the Wrong Gauge for the Material
Not all ultrasonic gauges work on all materials. Metals with coarse grainsŌĆölike cast ironŌĆöcan absorb or scatter sound waves, making thickness measurement unreliable with a standard device.
Tip:┬ĀCheck the user manual or visit the deviceŌĆÖs official website┬Āto confirm which materials your ultrasonic metal thickness gauge is compatible with. If you need to test challenging materials, consult your supplier for advanced probe options or compatible models.
Final Thoughts: Get More from Your Gauge
An ultrasonic metal thickness gauge┬Āis a powerful toolŌĆöif you use it correctly. By avoiding common errors like poor calibration, improper couplant use, and misreading coated surfaces, you ensure your measurements are both accurate and actionable.
Whether youŌĆÖre inspecting pipelines, ship hulls, or pressure vessels, your process matters as much as your equipment. With the right techniques and a disciplined approach, youŌĆÖll protect assets, improve safety, and deliver trustworthy inspection results.


